Storing and preparing water for discus water changes: barrel, aeration, heating
Water for changes should be prepared in advance: a food-safe container, 12–24h aeration, heating to tank temperature, dechlorination and a pH/TDS check. Full setup and mistakes to avoid.
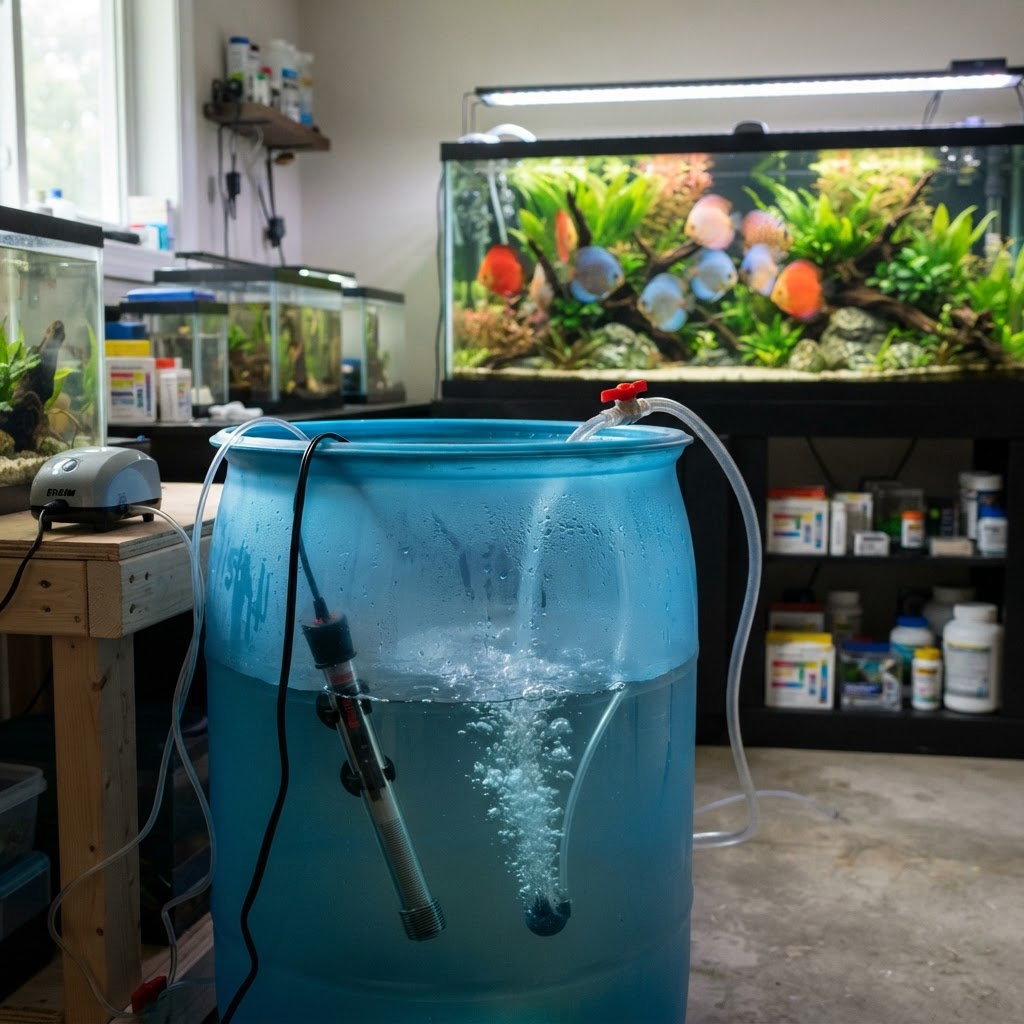
Quick summary
- Prepare water 12–24h before the change
- Food-safe plastic (HDPE) container or dedicated barrel
- Continuous aeration with an air pump and airstone
- Heat to tank temperature (±0.5°C)
- Dechlorinate: Prime 5 ml per 200 L of new water
- Check pH and TDS before you pour the water in
In short
- Water for changes is prepared 12–24 hours in advance, in a dedicated container.
- Aeration removes dissolved CO2 and stabilizes pH; a heater brings the water to tank temperature.
- Dechlorination is mandatory for tap water (chlorine and chloramine).
- Before the change, check the temperature, pH and TDS of the prepared water.
What you'll learn
- Why water "straight from the tap" is a risk for discus
- Which container to choose and what volume you need
- The full setup: air pump, airstone, heater, transfer pump
- How to use peat or catappa leaves in the barrel
- The mistakes that undo all the effort
Why not use water straight from the tap
Tap water often arrives cold (8–15°C / 46–59°F in winter), with chlorine or chloramine and dissolved CO2. If you pour it straight in:
- Temperature drops suddenly → stress, lower immunity, risk of ich.
- Dissolved CO2 gasses off in the tank → pH rises within hours compared to the tap reading.
- Microscopic gas bubbles ("milky" water) can irritate the gills.
Water stored and aerated for 12–24h has stable, predictable parameters — exactly what discus want.
Which container to choose
| Container | Pros | Cons |
|---|---|---|
| Food-grade HDPE barrel 120–220 L (30–60 gal) | Cheap, inert, easy to find | Takes up space |
| IBC tote 600–1000 L | Ideal for several tanks | Needs space (garage, basement) |
| Old aquarium / acrylic tub | You can see water clarity | Fragile, small volume |
| Plastic storage bin | Cheap | Only if food-grade plastic |
Volume rule: the container should hold at least one full water change — for a 300 L tank with 50% changes, at least 150 L, ideally 200 L.
Avoid painted buckets, containers that held chemicals, or recycled plastic of unknown quality.
The complete water station setup
- Air pump + airstone — runs continuously; removes CO2 and adds oxygen.
- Heater set to tank temperature (28–30°C / 82–86°F). For 200 L: 200–300 W.
- Transfer pump (submersible, 1500–3000 L/h) with a hose to the tank — no more carrying buckets.
- Lid — keeps out dust and insects and reduces evaporation.
- Optional: an RO unit filling the barrel directly, with an automatic float valve.
Dechlorinating and remineralizing in the barrel
- Chloramine does not disappear with aeration — use a conditioner (e.g. Seachem Prime: 5 ml per 200 L).
- If you use RO water, remineralize in the barrel and let it mix for 12h before measuring.
- Measure TDS and pH after aeration, not right after filling.
Peat and catappa in the barrel (optional)
For softer, slightly acidic water (breeding, wild discus) you can add to the barrel:
- Granular peat in a filter bag (about 100 g per 100 L), for 2–3 days.
- Catappa leaves: 1 medium leaf per 50 L.
Tannins tint the water tea-colored and lower pH slightly. Check pH before each change so it doesn't differ much from the tank.
Common mistakes
- Using the water right after filling, without aeration.
- More than 1°C difference between barrel and tank.
- Dirty container — biofilm and algae from the barrel end up in the tank.
- Leaving the heater on in an empty barrel → fire risk. Use a heater with dry-run protection.
- Not checking pH after aeration and getting pH jumps with every change.
Water station checklist
- ☐ Food-safe container with a lid, volume ≥ one full change
- ☐ Air pump + airstone running for 12–24h
- ☐ Heater set to tank temperature
- ☐ Conditioner dosed for the new volume
- ☐ pH, TDS and temperature checked before the change
- ☐ Barrel rinsed monthly (no detergent)
What to do next
📚 Learn more:
- How often to change discus water
- Dechlorinating discus water
- Mixing RO and tap water
- Blackwater for discus
🧮 Calculate:
🛒 Shop: